बिना paid news theme और भारी plugin stack के custom design बनाने से लेकर website live करने तक की practical guide।
एक news website का premium look सिर्फ बड़े banner, slider या चमकदार effects से नहीं आता। साफ typography, सही image proportions, एक जैसा card alignment और आसानी से मिलने वाली categories मिलकर पढ़ने का अच्छा अनुभव बनाते हैं। Khabar Zone बनाते समय हमने इसी approach को अपनाया: पहले editorial design तय किया, फिर Codex की मदद से उसे code में तैयार किया और उसके बाद WordPress के posts, categories तथा templates से जोड़ा।
इस लेख में आप जानेंगे कि हमने इस project की structure कैसे बनाई, कौन-सी files किस काम आती हैं, dashboard से setup कैसे होता है और production hosting पर इसे live करने के लिए क्या करना होगा।
पहले एक तकनीकी बात साफ करें: सामान्य WordPress website पूरी तरह “बिना theme” नहीं चलती। इस project में हमने कोई ready-made paid news theme नहीं खरीदी; अपनी lightweight custom theme तैयार की है। Elementor integration और demo import के लिए अलग companion plugin भी है। इसलिए सही बात है—बिना paid theme और अनावश्यक plugin stack के custom news website बनाना।
WordPress News Website कैसे बनाएं? सीधा जवाब
WordPress में custom news website बनाने के लिए Codex से lightweight theme तैयार करवाएं, staging पर उसकी ZIP install करें, posts और categories जोड़ें, homepage सेट करें और mobile, search तथा article pages जांचें। इसके बाद compatible hosting, domain और HTTPS के साथ launch करें। Paid news theme खरीदना जरूरी नहीं, लेकिन custom theme की जरूरत रहती है।
Khabar Zone project में हमने क्या तैयार किया?
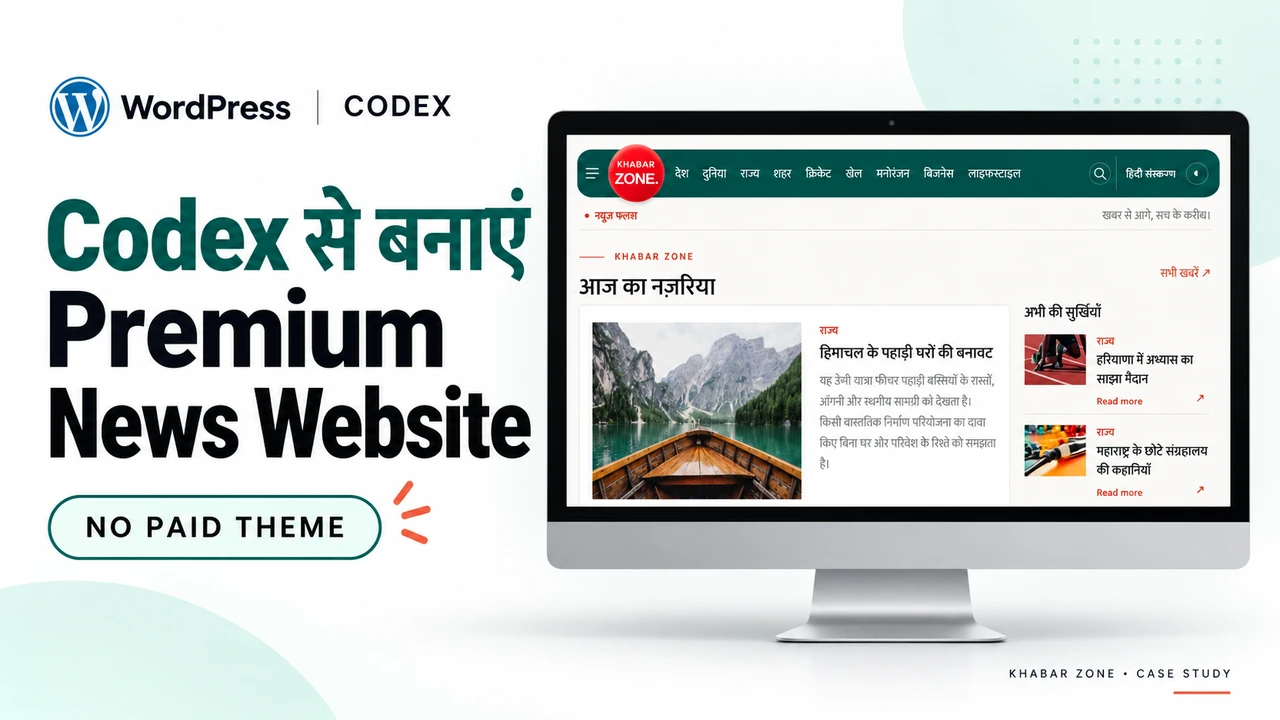
Khabar Zone एक Hindi editorial news portal project है। इसके package में installable custom WordPress theme, companion plugin, 70 fictional demo articles, 24 विषयों की categories, Elementor templates और HTML/CSS/JavaScript वाला static preview शामिल है।
Design में capsule-style header, category navigation, search panel, left-side off-canvas menu, featured story area, अलग editorial sections, archive listing, single article layout और advertisement placements रखे गए हैं। Header का dark-mode toggle एक छोटे JavaScript module से चलता है।
शुरुआती static preview design देखने के काम आता है। वह अपने-आप WordPress installation नहीं बन जाता। WordPress वाला हिस्सा theme और plugin install करने के बाद database में मौजूद posts तथा categories से content लेता है।

वास्तविक screenshot: इसी project package को WordPress Playground में चलाया गया है। यह tutorial demo है, production hosting का screenshot नहीं।
Premium look के लिए हमारी design approach
हमने एक साथ बहुत सारे effects जोड़ने के बजाय छोटे, दिखाई देने वाले सुधारों पर काम किया। सामान्य cards में category, concise title और Read more रखा; excerpt केवल featured cards में दिया। इससे listing हल्की और पढ़ने योग्य रही।
Card titles के लिए desktop पर लगभग 18px और mobile पर 17px का scale रखा गया। लंबे headlines के लिए अलग Khabar Zone — Short card title field है। करीब 5–8 शब्दों का display title card alignment में मदद करता है, जबकि full WordPress title अलग रखा जा सकता है। हालांकि current single template भी इसी short title helper का इस्तेमाल करता है; full title article heading में चाहिए तो template बदलना होगा।
Images को stretch या crop करने के बजाय object-fit: contain से frame में दिखाया गया। इससे पूरी image दिखती है। अलग aspect ratios की images में खाली जगह रह सकती है; एक जैसे proportions की editorial images देने से परिणाम और consistent होगा।
Header में सबसे ज़रूरी categories रखीं और बाकी विषयों को बाएं खुलने वाले off-canvas menu में दिया। Menu close button, Escape और बाहर click करने से बंद होता है। इस व्यवहार के लिए अलग mega-menu plugin नहीं लगाया गया।
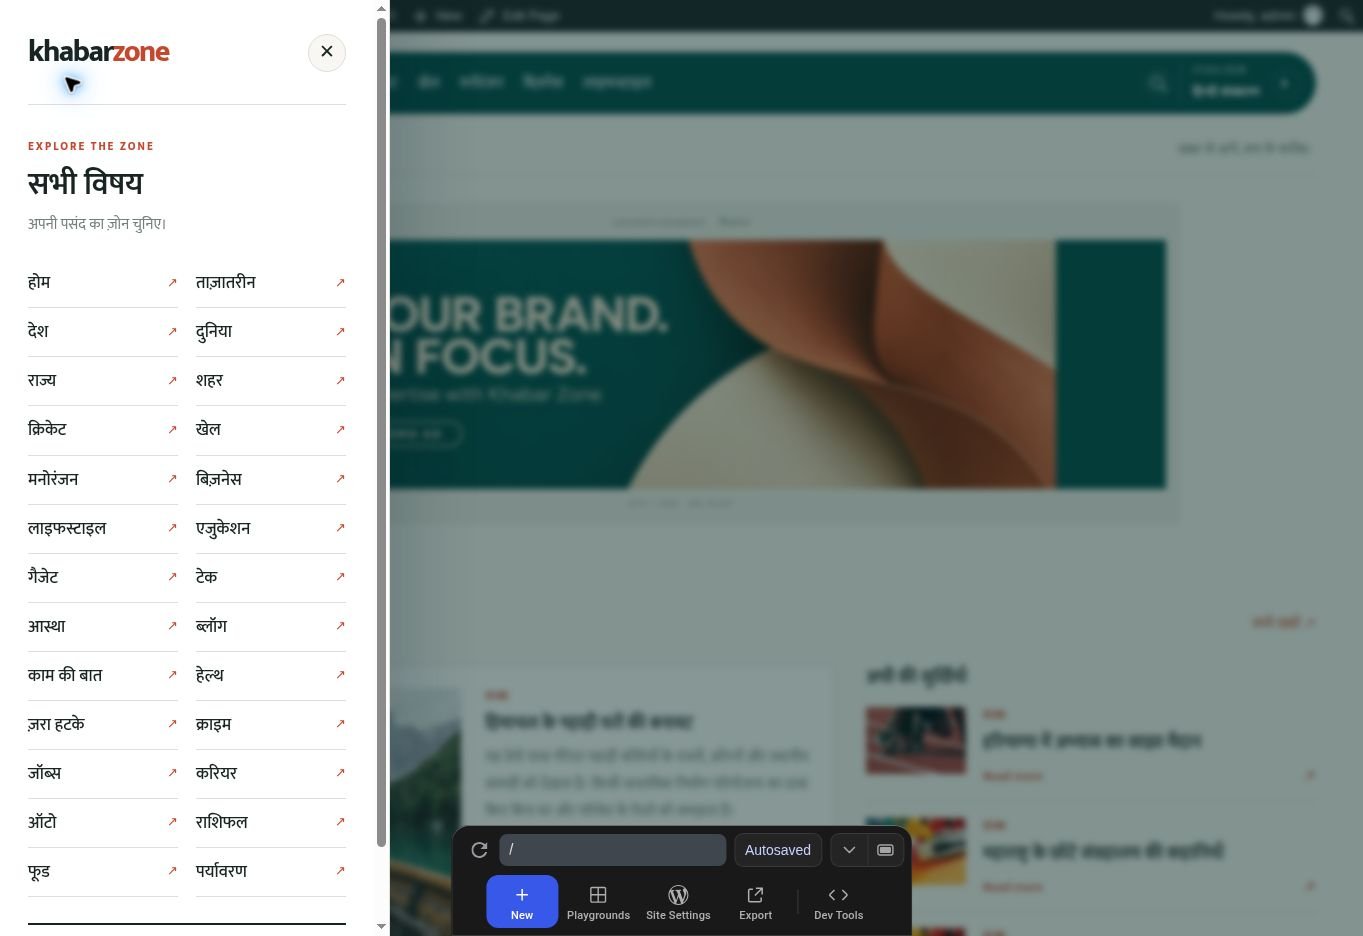
वास्तविक screenshot: left-side topic drawer और उसके पीछे dimmed homepage।
Step 1: Website की जरूरतें पहले लिखें
Code बनवाने से पहले एक छोटा brief तैयार करें। उसमें website का नाम, audience, भाषा, logo, brand colours और जरूरी page types लिखें। News portal के लिए homepage, category archive, search results और single article page शुरू से plan करें। केवल homepage सुंदर होने से पूरी website तैयार नहीं होती।
Advertisement के लिए कौन-सी जगहें चाहिए, mobile पर header कैसे दिखेगा और editor रोज article कहां से publish करेगा—ये बातें भी brief में शामिल करें। Khabar Zone में हमने demo articles से sections की density और alignment देखी, ताकि खाली layout देखकर निर्णय न लेना पड़े।
Project brief के और उदाहरण के लिए हमारी ChatGPT Work से website बनवाने की practical guide भी पढ़ें।
Step 2: Codex को पूरा brief दें, फिर छोटे सुधार करवाएं
Codex को केवल “एक premium website बना दो” लिखने से बेहतर है expected behaviour और verification बताना। उदाहरण के लिए यह prompt इस्तेमाल किया जा सकता है:
Create a lightweight custom WordPress classic theme for a Hindi news portal.
Use native WordPress posts, categories, featured images and pagination.
Build homepage, archive, search, single-post and 404 templates.
Use a consistent card-title scale, concise display titles, and excerpts only on featured cards.
Add an accessible left off-canvas category menu and four editable advertisement slots.
Keep Elementor optional. Do not require a commercial news theme or unrelated plugins.
Provide installable ZIP files, a README and a clear list of tests completed and pending.
यह एक reusable prompt example है, पिछली बातचीत का verbatim transcript नहीं। शुरुआत में structure बनवाएं, उसके बाद अलग prompts में card spacing, typography, mobile navigation और article layout सुधारें। Screenshots के साथ exact समस्या बताना उपयोगी रहता है—जैसे “इन चार cards में image frames और title-to-link spacing एक जैसी रखें।”
Code review भी workflow का हिस्सा है। Codex से PHP syntax, output escaping, input sanitization, admin permissions और nonce checks देखने को कहें। सुंदर preview को production-ready code का प्रमाण न मानें।
Step 3: Static design को WordPress templates में बदलें
इस project की custom theme का folder khabar-zone है। प्रमुख files का काम इस प्रकार है:
| File | काम |
|---|---|
style.css |
Theme की पहचान और metadata |
functions.php |
Theme support, section rendering, shortcodes, ads और custom fields |
header.php / footer.php |
Shared header, navigation और footer |
front-page.php |
Homepage rendering |
archive.php / search.php |
Category/archive और search results |
single.php |
Individual article layout |
page.php, index.php, 404.php |
सामान्य pages, fallback और not-found page |
assets/styles.css / assets/theme.js |
Layout styles और छोटे UI interactions |
Home page के लिए [kz_home], archive page के लिए [kz_archive] और single-preview के लिए [kz_single preview_id="123"] shortcodes मौजूद हैं। आखिरी shortcode में 123 की जगह किसी असली published post का ID देना होता है। इन project-specific shortcodes को किसी दूसरी WordPress website पर बिना Khabar Zone theme के काम करने वाला न समझें।
Step 4: Staging पर WordPress तैयार करें
पहले testing installation या hosting की staging site पर काम करें। वहां theme और plugins install करने का administrator access होना चाहिए। WordPress को official source या hosting provider के installer से install करें। Site title, language और timezone जांचें।
इस tutorial के वास्तविक dashboard screenshots WordPress Playground के demo installation से लिए गए हैं। Capture के समय वहां WordPress 7.1.3 और PHP 8.3.33 दिखे। Hosting पर version, भाषा और screen labels कुछ अलग हो सकते हैं। Playground में चलना public domain पर live हो जाने के बराबर नहीं है।
Step 5: सही theme ZIP upload करें
Complete project package को अपने computer पर extract करें। उसके अंदर मिलने वाली khabar-zone-theme.zip ही installable theme है। पूरा Khabar-Zone-WordPress-Elementor.zip सीधे theme installer में upload न करें।
- Dashboard में Appearance → Themes खोलें।
- Add Theme / Add New → Upload Theme चुनें।
khabar-zone-theme.zipselect करें।- Install Now पर click करें।
- Installation सफल होने पर Activate करें।
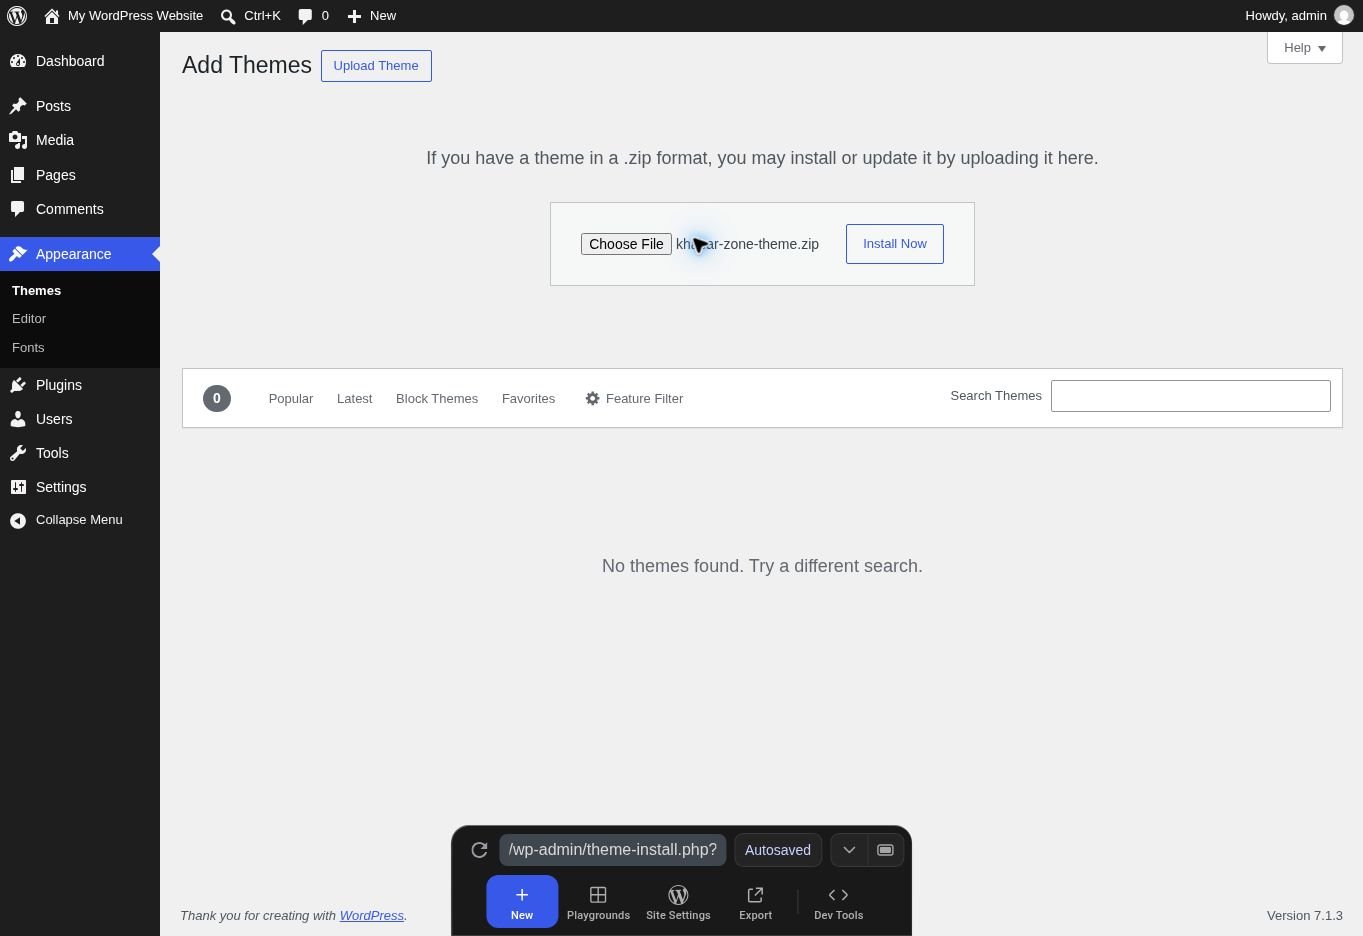
Screenshot 1: सही installable theme ZIP चुनी हुई है।
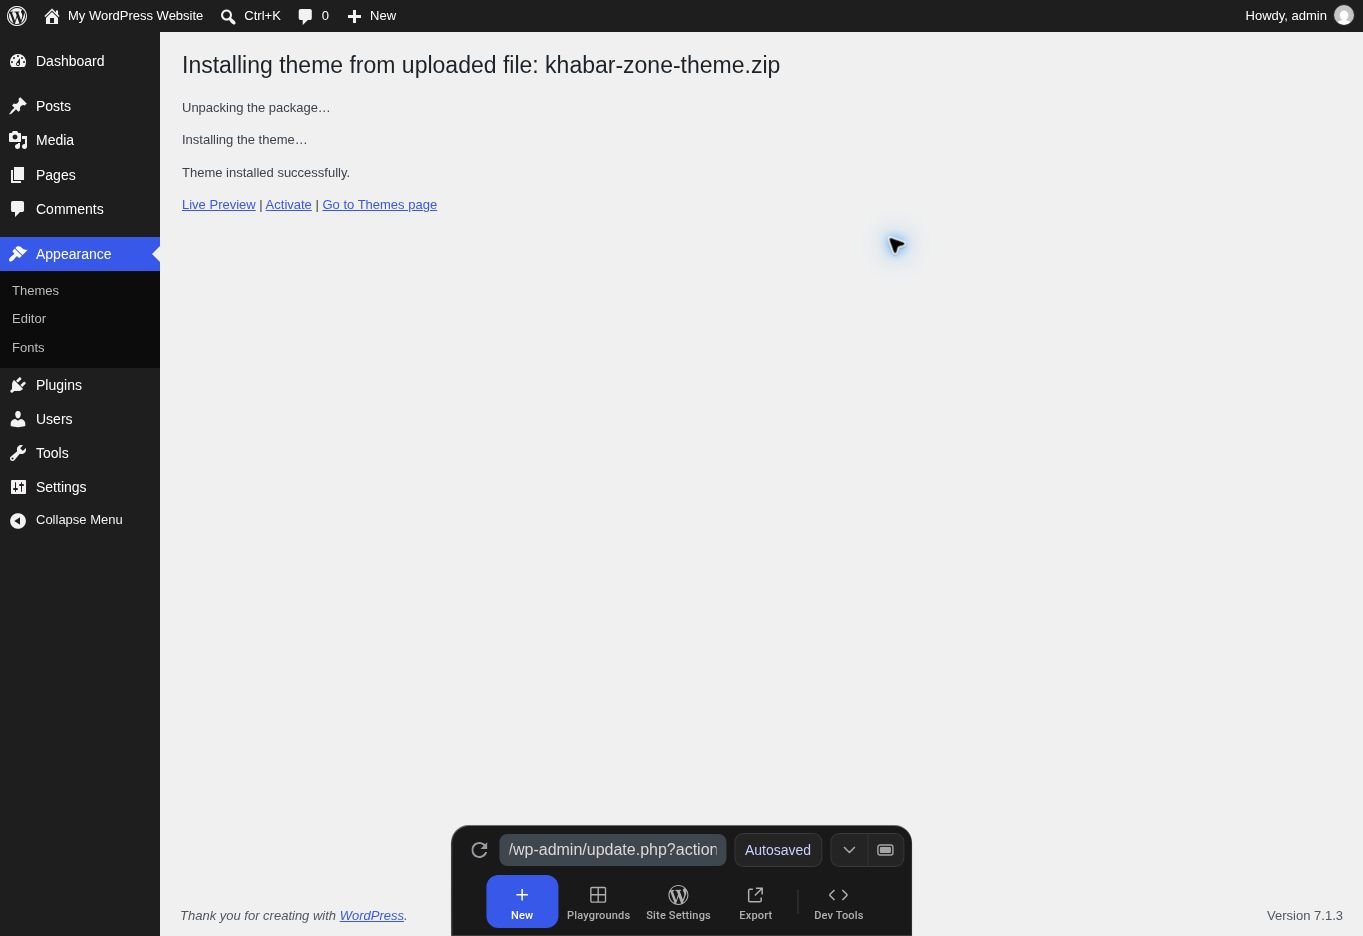
Screenshot 2: WordPress का वास्तविक “Theme installed successfully” परिणाम।
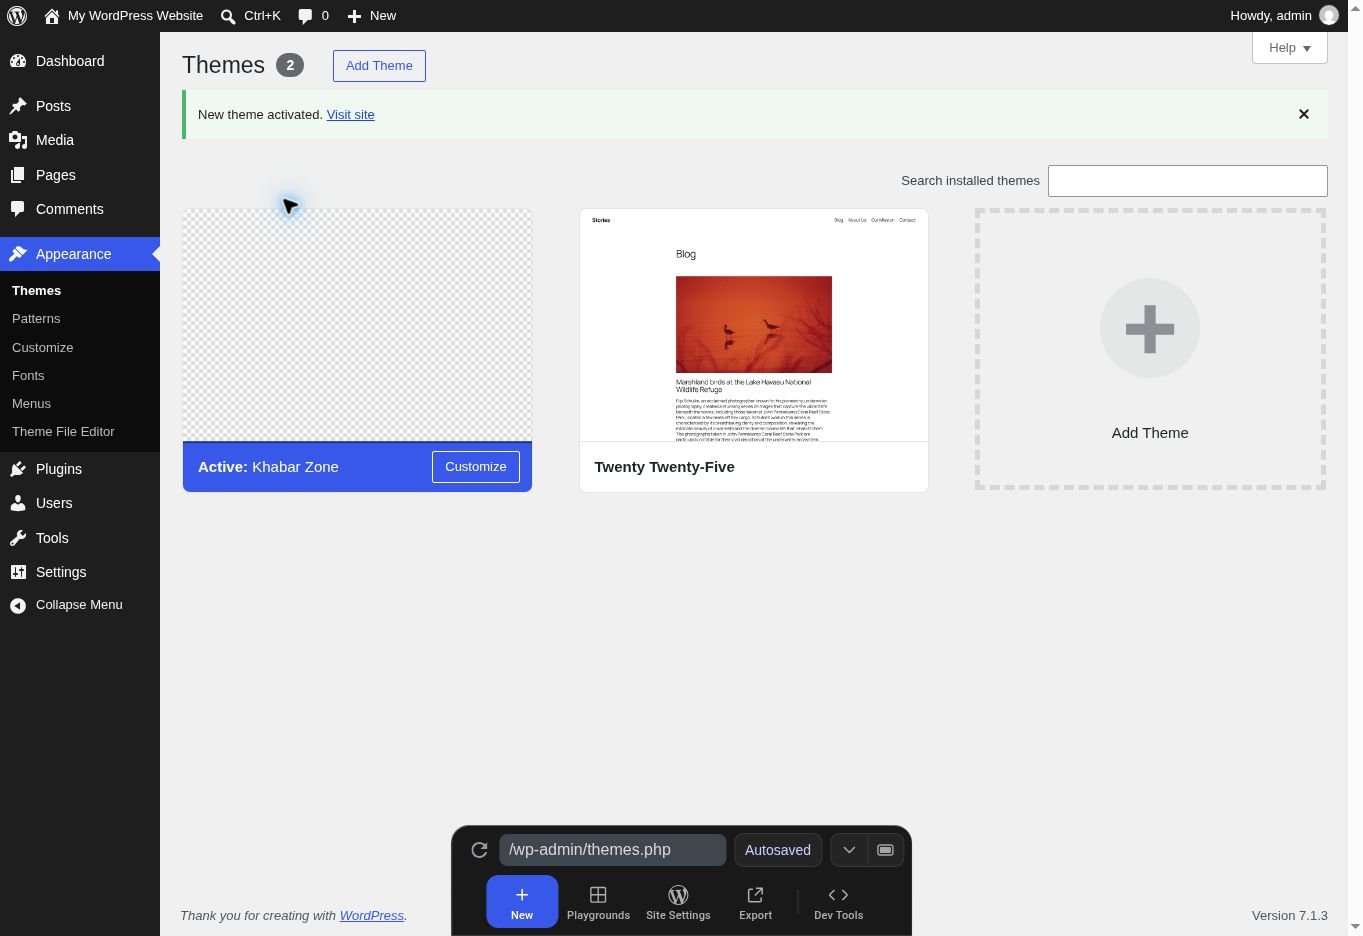
Screenshot 3: Appearance → Themes में Khabar Zone active है। Theme thumbnail खाली होने का अर्थ activation failure नहीं है।
अगर “stylesheet missing” error आए तो पहले ZIP structure देखें। अक्सर complete bundle को theme समझकर upload करने से यह समस्या आती है। Theme folder के अंदर उसकी style.css और template files सही स्थान पर होनी चाहिए।
Step 6: Companion plugin install करें
अब Plugins → Add Plugin / Add New → Upload Plugin में khabar-zone-elementor.zip upload करें। Install Now के बाद Activate Plugin चुनें। इसका dashboard नाम Khabar Zone Elementor Widgets & Demo Import है।
यह plugin custom editorial widgets और explicit demo importer देता है। नाम में Elementor होने के बावजूद demo import वाला रास्ता Elementor install किए बिना भी चल सकता है। इस tutorial में हमने पहले यही रास्ता इस्तेमाल किया। Visual section editing चाहिए तो official Elementor plugin अलग से install करें।
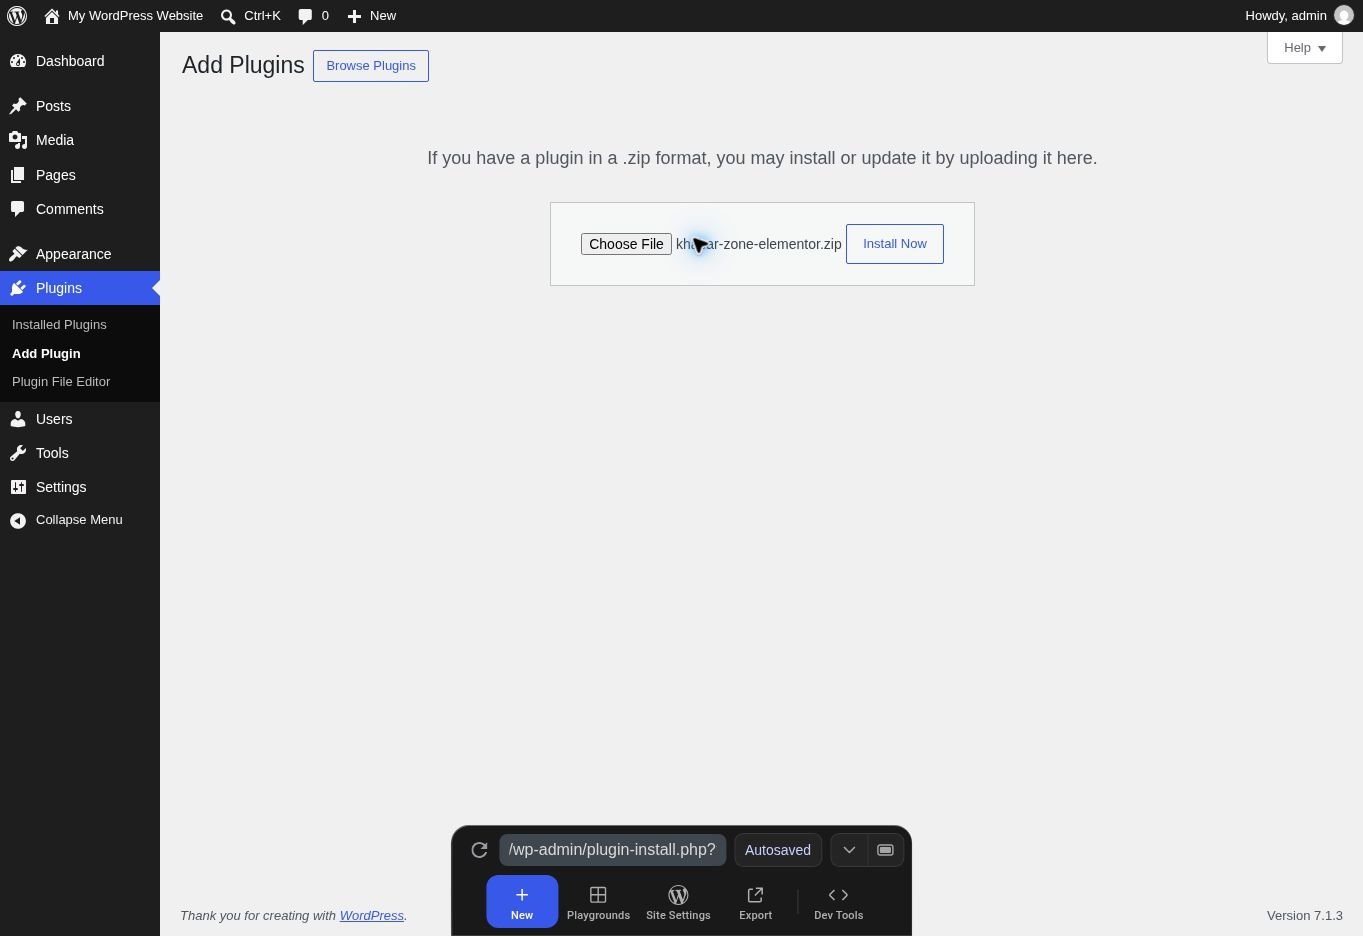
Screenshot 4: companion plugin की अलग ZIP WordPress plugin installer में upload होती है।
Step 7: 70 demo posts import करें
Tools → Khabar Zone Demo खोलें। यहां Import 70 published demo posts and create pages button मिलेगा। Staging installation पर इसे चलाएं। Importer 70 demo posts, उनकी categories और Home तथा Archive pages बनाता है। Reading settings वह अपने-आप नहीं बदलता।
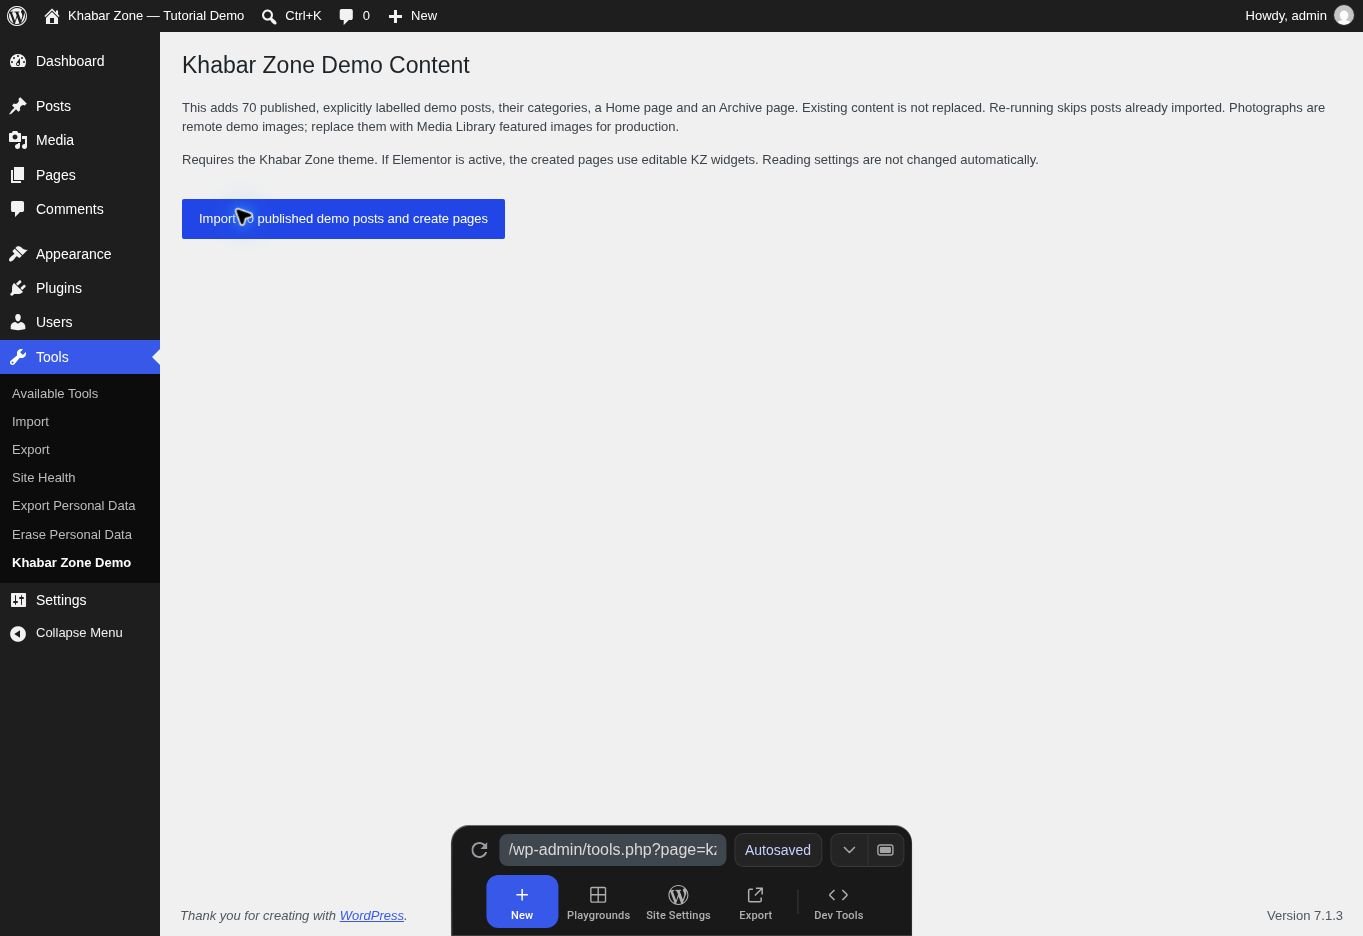
Screenshot 5: importer क्या जोड़ेगा, यह button दबाने से पहले लिखा हुआ है।
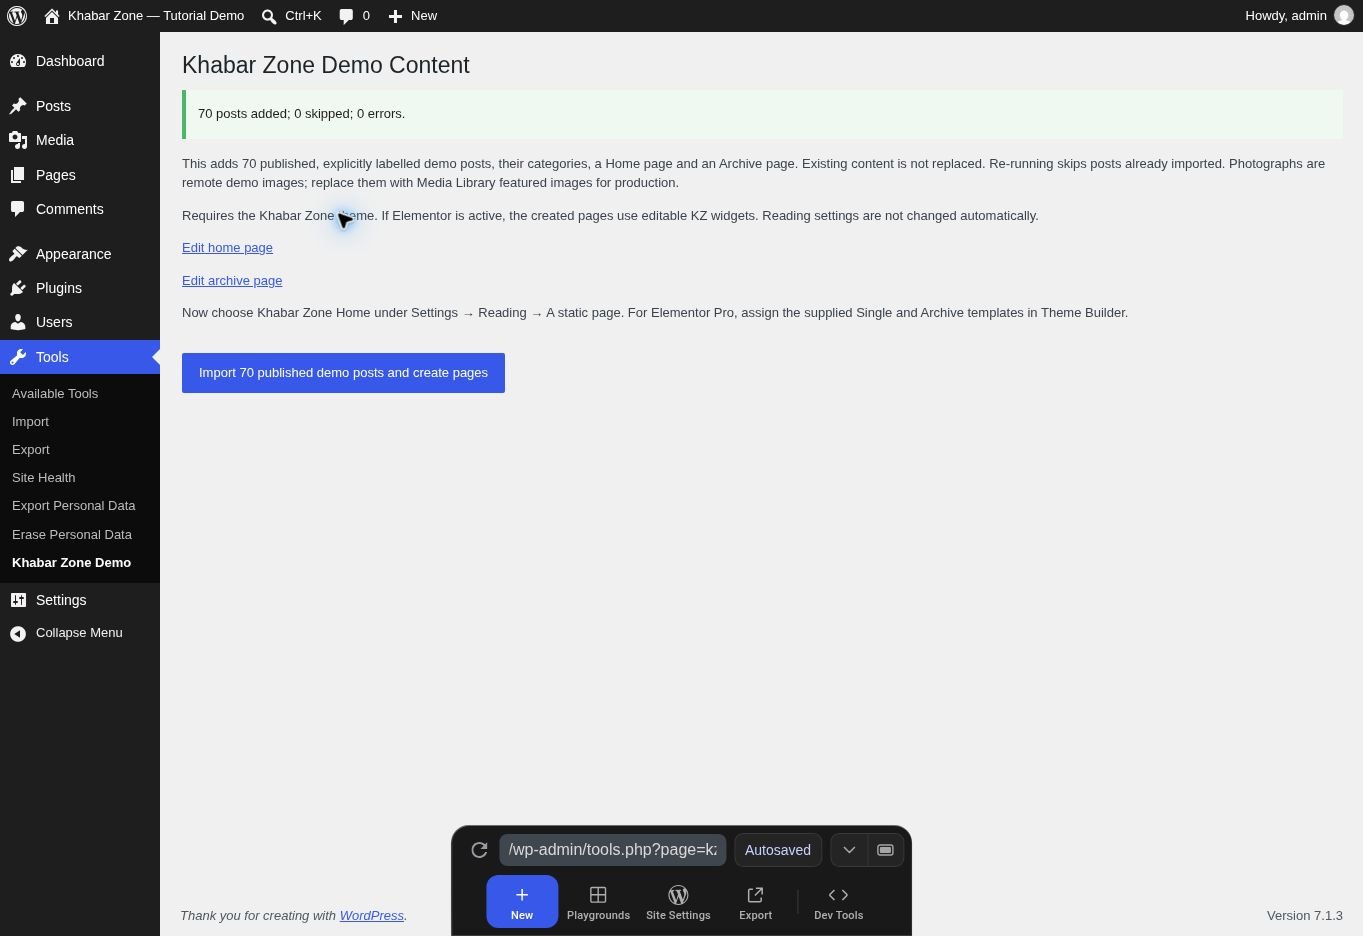
Screenshot 6: इस tutorial run में “70 posts added; 0 skipped; 0 errors” मिला।
Importer अपने demo IDs के आधार पर पहले से import किए गए demo posts को skip करता है। ये articles fictional हैं। इन्हें public news reporting की तरह live न रखें। Production के लिए verified reports, अपने editorial text और उपयुक्त rights वाली images लगाएं। Demo images external URLs से आती हैं; स्थायी website में Media Library की featured images इस्तेमाल करें।
Step 8: Home page चुनें
- Settings → Reading खोलें।
- A static page select करें।
- Homepage में Khabar Zone Home चुनें।
- इस package के अलग shortcode/Elementor archive page को बनाए रखने के लिए Posts page खाली छोड़ें।
- Save Changes करें।
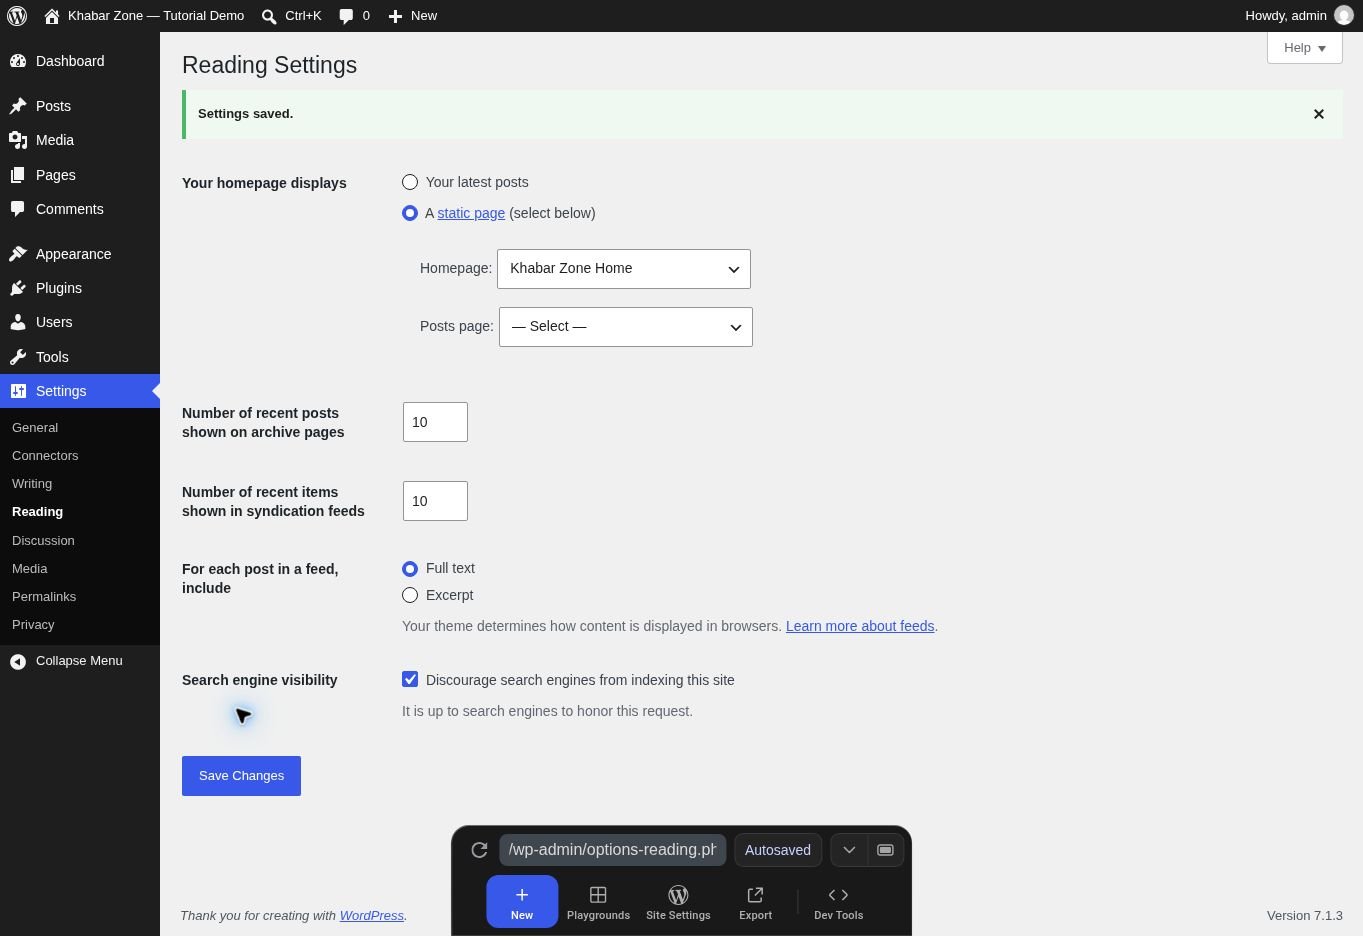
Screenshot 7: homepage चुना गया है। Demo में indexing discourage की गई है; production launch पर इस setting का अलग से review करें।
अगर custom homepage की जगह साधारण posts listing दिखे तो यही setting और Home page content पहले जांचें। Theme active होना और सही front page चुना होना अलग बातें हैं।
Step 9: Categories और menu व्यवस्थित करें
Posts → Categories में demo categories देख सकते हैं। Package में 24 विषयों की categories हैं। Fresh WordPress की default “Uncategorized” के साथ dashboard में कुल 25 items दिखना सामान्य है। Real project में अपनी editorial जरूरत के अनुसार categories रखें।

Screenshot 8: imported categories और उनके post counts।
फिर Appearance → Menus में menu बनाएं, जरूरी category links जोड़ें और उसे Primary categories location पर assign करें। Header में हर category भरने के बजाय मुख्य विषय चुनें। Current off-canvas drawer की topic list theme code में भी तय की गई है; विषयों के नाम बदलने पर drawer mapping को Codex से उसी अनुसार update करवाएं। सिर्फ WordPress menu बदलने से drawer की पूरी hard-coded list अपने-आप नहीं बदलेगी।
Step 10: Logo, images और advertisement slots बदलें
Logo के लिए Appearance → Customize → Site Identity देखें। अलग header, footer या drawer में logo rendering hard-coded हो तो उन templates को भी update करें; एक जगह logo upload करने को पूरे project की हर branding location बदलने का प्रमाण न मानें।
Ads के लिए Appearance → Customize → Khabar Zone — Advertisement slots खोलें। यहां image और optional destination URL के controls हैं।
| Placement | इस package का creative size |
|---|---|
| Header leaderboard | 970 × 250 |
| Homepage/archive middle | 970 × 250 |
| Sidebar rectangle | 300 × 250 |
| In-article banner | 970 × 250, content width के अनुसार scale |
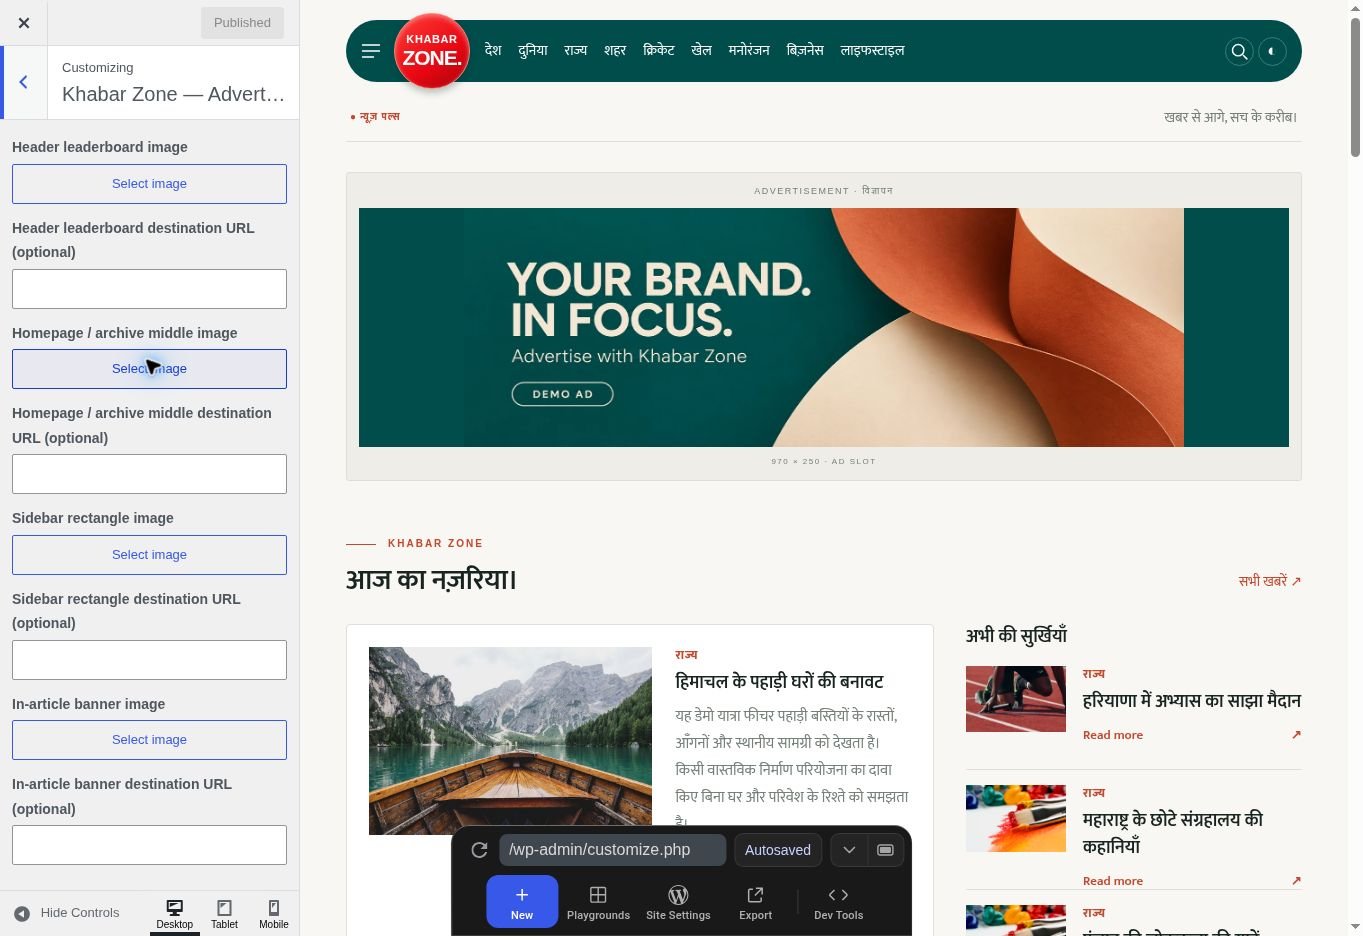
Screenshot 10: वास्तविक Customizer में ad images और links बदलने के controls।
यह image-based ad placement है। इसमें अपने-आप Google AdSense approval, ad account, tracking या revenue शुरू नहीं होता। किसी ad network का इस्तेमाल करना हो तो उसका integration और testing अलग करना होगा।
Step 11: Elementor कब जरूरी है?
अगर आप dashboard में sections को visually edit करना चाहते हैं, तो Elementor activate करके Home page को Edit with Elementor में खोलें। Companion plugin का Khabar Zone Editorial widget layout, heading, category, post count, spacing और title size बदलने के controls देता है।
Importer चलाते समय Elementor active हो तो pages में Elementor data बनाया जाता है। पहले import कर चुके हों तो importer दोबारा चलाकर existing pages के अपने-आप convert होने की अपेक्षा न करें; supplied JSON templates import करें या page को manual तरीके से configure करें।
home.json, archive.json और single.json page previews हैं। वास्तविक archive/single display conditions वाले Theme Builder templates Elementor Pro के लिए अलग हैं। Pro इस package में शामिल नहीं है। Pro के बिना native archive.php और single.php templates उपलब्ध हैं। इस tutorial run में Elementor editor और Pro template imports की testing नहीं की गई है।
Step 12: Permalinks और content publishing जांचें
नई website के लिए Settings → Permalinks → Post name → Save Changes चुन सकते हैं। पहले से indexed website की URLs बदल रहे हों तो redirects की योजना बनाएं; यह step बिना सोचे किसी पुरानी live site पर लागू न करें।
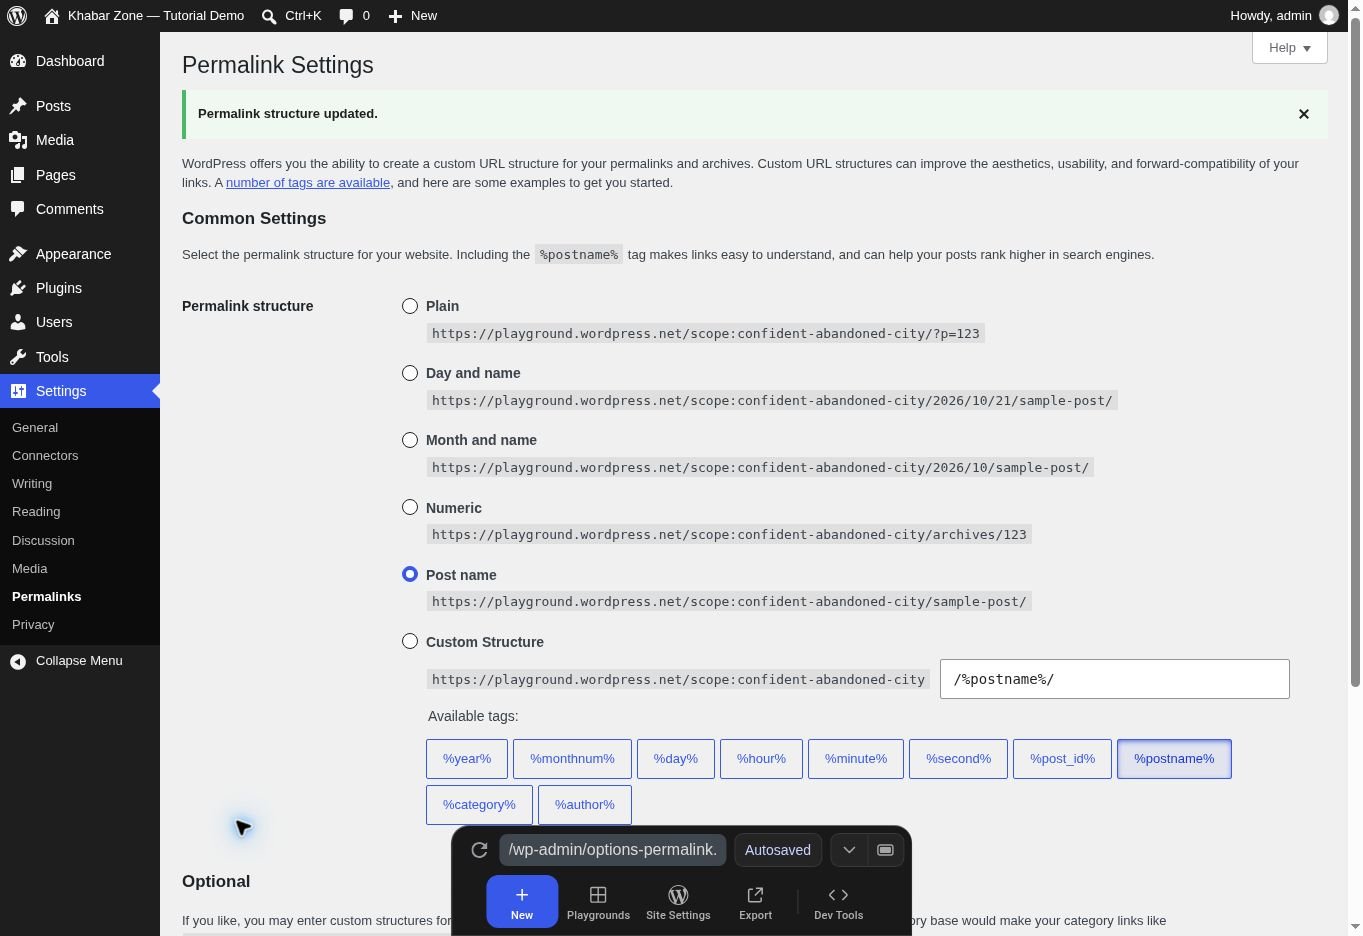
Screenshot 9: Post name structure save करने के बाद WordPress का वास्तविक confirmation।
Article डालने के लिए Posts → Add Post / Add New खोलें। Headline, body, category, excerpt और featured image भरें। जरूरत हो तो short card title field भी भरें। Publish करने से पहले Preview में card और full article दोनों देखें। Category link, Read more, search और archive pagination भी खोलकर जांचें।
Related guide: AI-ready website में content और business information कैसे व्यवस्थित करें। साफ entity details और उपयोगी answers मदद करते हैं; Google या AI answers में visibility की guarantee नहीं होती।
Step 13: Hosting और domain पर website live करें
सबसे सरल fresh-launch रास्ता है final hosting पर WordPress install करना और वहां tested theme तथा जरूरी plugin deploy करना। Hosting dashboard का नाम अलग हो सकता है, लेकिन क्रम यह रहेगा:
- Domain जोड़ें: hosting में website/domain create करें। Registrar के DNS में host द्वारा दिए nameservers या A/AAAA/CNAME records लगाएं। Exact values अपने provider से लें।
- SSL चालू करें: certificate issue होने के बाद HTTPS खोलकर जांचें। SSL उपलब्ध होने से पहले URL को जबरदस्ती HTTPS में बदलना ठीक नहीं।
- WordPress install करें: final domain और सही directory चुनें। Root website चाहिए तो गलती से
/wordpresssubfolder न चुनें। - Backup रखें: existing website बदल रहे हों तो files और database का restore करने योग्य backup लें।
- Theme और जरूरी plugins install करें: ऊपर बताए सही ZIP files upload करें।
- Real content डालें: staging demo import production में बिना समीक्षा न दोहराएं। Fictional demo news, sample contacts और external demo images बदलें।
- Home, menus, logo और ads सेट करें: final domain पर सभी links खोलें।
- Functional testing करें: article, category, search, 404, mobile menu और ad destinations देखें।
- Indexing review करें: public launch के लिए Settings → Reading में “Discourage search engines from indexing this site” की tick हटाएं और Save Changes करें। Staging पर इसे रखा जा सकता है; यह access-control या password protection नहीं है।
- Sitemap देखें: WordPress core sitemap सामान्यतः
/wp-sitemap.xmlपर होता है। इसे browser में खोलकर जांचें और अपनी Search Console property में submit करें।
यह hosting पर करने की प्रक्रिया है, Khabar Zone के production domain पर पूरा हो चुके deployment का दावा नहीं। इस लेख के screenshots demo WordPress के हैं; DNS, SSL या hosting dashboard की नकली screenshots शामिल नहीं हैं।
Hosting विकल्प देख रहे हैं तो Bluehost के मौजूदा hosting विकल्प देखें (affiliate link)। Custom theme के लिए ऐसा WordPress setup चुनें जिसमें theme ZIP upload और जरूरी plugin installation की अनुमति हो। कीमत, renewal, backup, PHP compatibility और plan limits checkout से पहले जांचें। किसी specific speed, discount या Google ranking की guarantee इस case study में नहीं दी गई है।
Bluehost के अलग products में भ्रम हो तो WordPress AI Builder और AI Website Builder का फर्क पढ़ें। Domain setup के लिए हमारी DNS, nameserver और SSL setup guide उपयोगी होगी।
अगर पूरी staging website migrate करनी हो
Theme ZIP के साथ posts, settings और media अपने-आप transfer नहीं होते। Files और database दोनों migrate करने होंगे। Host का migration tool इस्तेमाल कर सकते हैं या अनुभवी व्यक्ति WP-CLI से काम कर सकता है। पुराने domain को नए domain से बदलते समय serialized data संभालने वाला तरीका लें।
# पहले backup और सही installation path की पुष्टि करें।
# example domains को अपने staging/live domains से बदलें।
wp search-replace 'https://staging.example.com' 'https://example.com' --all-tables-with-prefix --skip-columns=guid --dry-run

# Dry-run की समीक्षा के बाद ही वास्तविक बदलाव करें।
wp search-replace 'https://staging.example.com' 'https://example.com' --all-tables-with-prefix --skip-columns=guid
wp rewrite flush
इसके बाद image URLs, menus, admin access, HTTPS redirects और article URLs जांचें। केवल Settings → General में address बदल देना complete migration नहीं है।
पूरी migration checklist के लिए बिना डाउनटाइम hosting migration की हिंदी guide पढ़ें।
Step 14: Live करने से पहले ये checks जरूर करें
- Homepage और हर जरूरी category में सही content हो।
- Card title, excerpt और Read more की spacing consistent हो।
- Mobile पर horizontal overflow न हो और drawer खुलकर बंद हो।
- Featured image, article image और ad banner का proportion सही हो।
- Demo posts तथा sample contact details review हो चुके हों।
- Search, archive pagination, related news और internal links काम करें।
- Forms या newsletter वास्तव में connected हों; केवल demo UI को working subscription system न बताएं।
- Backup restore करने का तरीका उपलब्ध हो।
- Login किए बिना public visitor की तरह website खुलती हो।
कम plugins रखना अपने-आप fast website की guarantee नहीं है। Hosting, image size, fonts, queries और ads भी performance प्रभावित करते हैं। Launch से पहले और real content जोड़ने के बाद mobile performance मापें; बिना measurement के “100 PageSpeed” जैसे दावे न करें।
इस tutorial में क्या सचमुच verify हुआ?
हमने project के installable theme और companion plugin को WordPress demo में activate किया। Demo importer ने 70 posts जोड़े और 0 errors दिखाए। Home page selection, categories, Post name permalink setting, ad controls, homepage rendering और off-canvas menu को वास्तविक dashboard/browser में देखा गया।
यह verification Elementor Pro, किसी hosting provider, production traffic, email delivery या Google News/AdSense approval की testing नहीं है। उन हिस्सों का काम और validation अलग होगा।
अक्सर पूछे जाने वाले सवाल
क्या WordPress में बिना किसी theme के news website बन सकती है?
सामान्य WordPress frontend के लिए theme की भूमिका रहती है। यहां मतलब paid ready-made theme खरीदने से बचना है। Khabar Zone में अपनी custom theme है।
क्या Elementor के बिना website चल सकती है?
इस project में native PHP templates और shortcodes वाला रास्ता है। Demo import के लिए companion plugin इस्तेमाल हुआ; visual Elementor editing optional है। कुछ editing सुविधाएं चुनने पर Elementor की dependency जुड़ती है।
क्या Codex का code सीधे live कर देना चाहिए?
पहले inspect, review और staging test करें। खासकर custom admin actions, uploads, permissions, PHP compatibility और content output जांचना जरूरी है।
क्या news portal को Google News में approval मिल जाएगा?
Website design तैयार होना approval की guarantee नहीं है। वास्तविक editorial quality, transparency और संबंधित platform की आवश्यकताओं का मूल्यांकन अलग होता है।
क्या imported demo content real news है?
नहीं। यह layout और publishing workflow दिखाने के लिए fictional editorial material है। वास्तविक news launch से पहले इसे बदलना होगा।
इस project से हमारी मुख्य सीख
Khabar Zone में premium look का आधार custom layout, readable Hindi typography, consistent image frames और छोटे-छोटे spacing decisions रहे। Codex ने structure और implementation पर काम करने में मदद की, जबकि design review और WordPress में वास्तविक परीक्षण ने अगला कदम स्पष्ट किया। यही workflow आप अपने brand और editorial needs के अनुसार अपनाकर एक custom news portal तैयार करने में इस्तेमाल कर सकते हैं।
संदर्भ और आगे पढ़ें
- WordPress: अपनी पहली classic theme
- WordPress: theme upload और activation
- WordPress: Reading Settings
- WordPress: Permalink Settings
- WordPress: installation guide
- WordPress: migration guide
- WordPress core XML sitemaps
- OpenAI: Codex prompting guidance
Affiliate Disclosure
इस लेख में दिया गया Bluehost link एक affiliate link है। इसके जरिए योग्य खरीदारी होने पर WebTakniki को commission मिल सकता है। Hosting खरीदना वैकल्पिक है। खरीदने से पहले provider की website पर current price, renewal, features और terms जांचें। यह Khabar Zone के Bluehost पर host होने या Bluehost पर performance test किए जाने का दावा नहीं है।