
आपकी website WordPress पर रह सकती है और उसका chatbot अलग Node.js backend पर चल सकता है। Visitor website में सवाल लिखेगा, backend request संभालेगा और जरूरत होने पर AI provider से जवाब लाएगा। इस setup में website और chatbot server को एक ही application मानने की जरूरत नहीं है।
इस guide में पहले locally चलने वाला छोटा demo समझेंगे, फिर उसे Bluehost VPS जैसे compatible server पर deploy करने का रास्ता देखेंगे। Demo rule-based है; उसमें paid AI API या real booking नहीं जुड़ी है। हमने उसके HTTP behavior को local environment में जाँचा है। Bluehost VPS पर deployment, DNS और paid model response का live test इस लेख के लिए नहीं किया गया है।
VPS लेने से पहले runtime तय करें
Bluehost के current VPS page पर application और OS options उपलब्ध हैं, लेकिन exact plan तथा region के अनुसार configuration बदल सकती है। Node.js version, SSH, Docker, reverse proxy और server management scope confirm करें। यह article fresh Linux VPS का सामान्य रास्ता बताता है, हर Bluehost dashboard का exact click-by-click UI नहीं।
WordPress वाली पूरी website को VPS पर shift करना जरूरी नहीं है। आप chatbot को अलग subdomain, जैसे chat.example.com, पर रख सकते हैं। यह example domain है; इसे अपनी settings में वास्तविक domain से बदलें। Domain का DNS record उस server के सही public IP पर जाएगा।
पहले local backend चलाएँ
अपने computer में official supported Node.js LTS install करें। एक project folder बनाएँ। Demo में server.mjs HTTP server चलाता है और index.html message भेजने वाला frontend है। Browser को /chat पर JSON भेजना है और जवाब में reply पढ़ना है।
नीचे दिया छोटा code flow समझाने के लिए है। पूरा downloadable demo input validation, request size और error handling भी करता है। किसी public server पर केवल यह छोटा snippet डालकर production-ready न मानें।
import http from 'node:http';
http.createServer(async (req, res) => {
  if (req.method !== 'POST' || req.url !== '/chat') {
    res.writeHead(404); res.end(); return;
  }
  let raw = '';
  for await (const chunk of req) {
    raw += chunk;
    if (Buffer.byteLength(raw) > 8192) {
      res.writeHead(413); res.end(); return;
    }
  }
  try {
    const { message } = JSON.parse(raw);
    if (typeof message !== 'string' || !message.trim()) {
      throw new Error('Invalid message');
    }
    res.writeHead(200, {'Content-Type':'application/json'});
    res.end(JSON.stringify({
      reply: 'Demo reply: team आपकी enquiry confirm करेगी।'
    }));
  } catch {
    res.writeHead(400); res.end('Invalid request');
  }
}).listen(3000, '127.0.0.1');
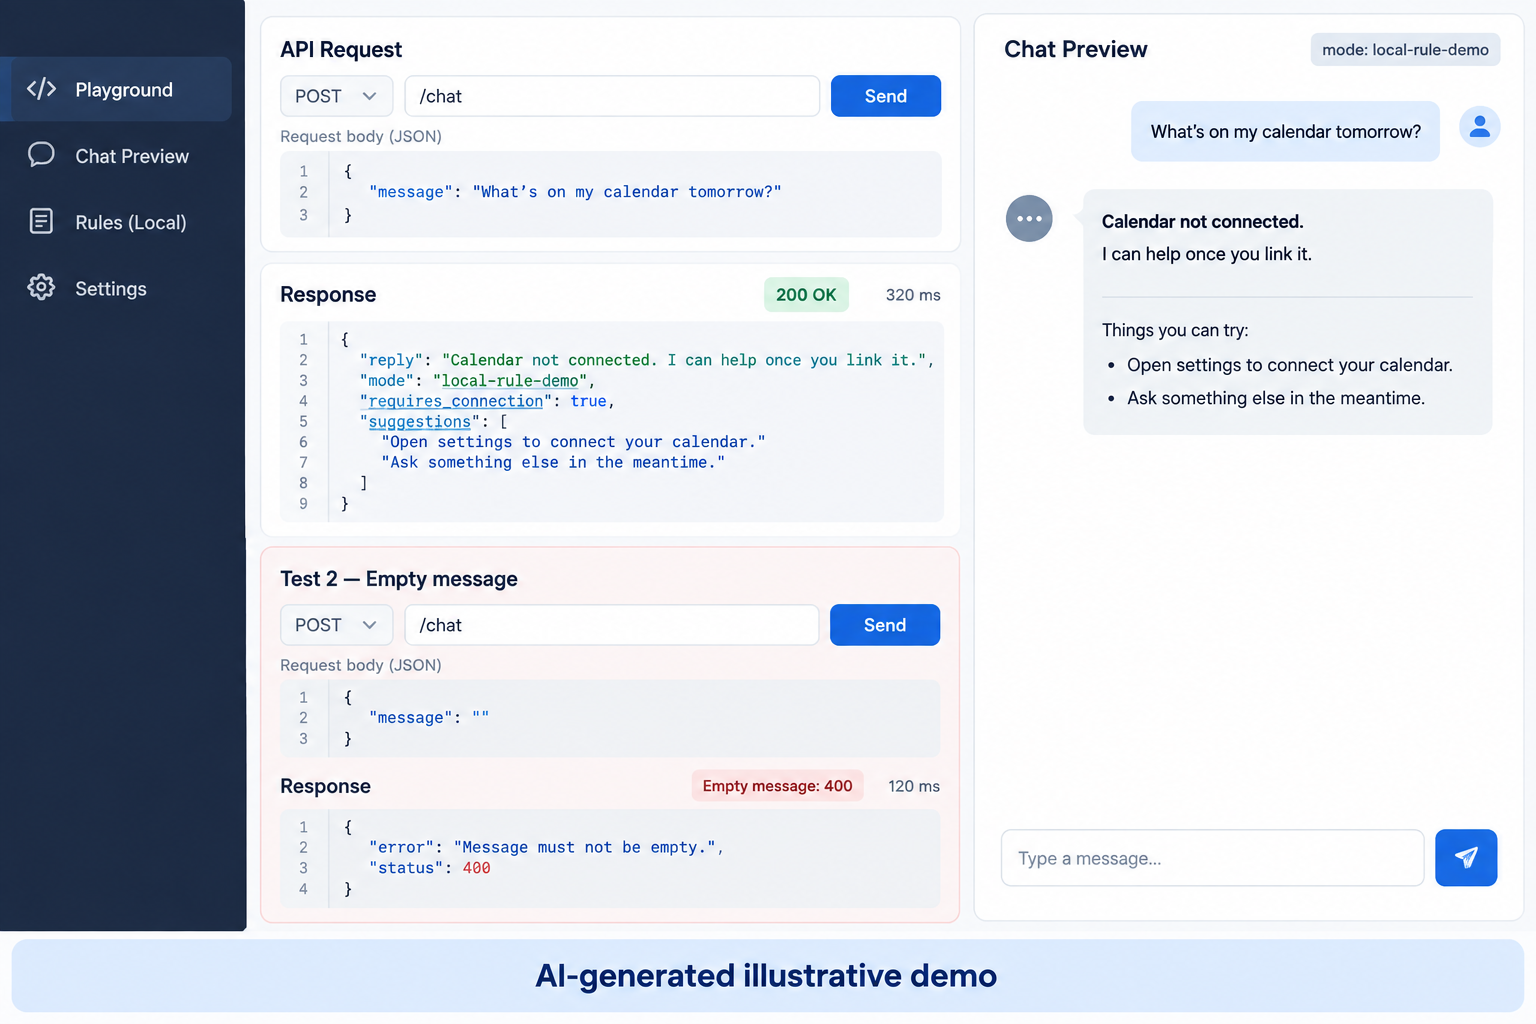
Server चलाने का command node server.mjs है। पूरा demo इस्तेमाल कर रहे हैं तो browser में http://127.0.0.1:3000 खोलें। “services” या “office hours” पूछें। जवाब fixed approved sample information से आता है। “book appointment” पूछने पर demo बताएगा कि calendar integration नहीं है और booking confirmed नहीं है।
पूरा local Node.js demo ZIP डाउनलोड करें। इसमें server.mjs, index.html और README हैं। यह rule-based learning demo है; AI provider या calendar connected नहीं है।
Browser से backend तक request समझें
Frontend message को fetch('/chat') से भेजता है। Local demo में page और endpoint एक ही origin पर हैं, इसलिए अलग CORS setup की जरूरत नहीं है। Response दिखाने के लिए textContent इस्तेमाल करें, ताकि model या visitor text को arbitrary HTML की तरह execute न किया जाए।
const response = await fetch('/chat', {
  method: 'POST',
  headers: {'Content-Type': 'application/json'},
  body: JSON.stringify({message: 'Aapki services kya hain?'})
});
const data = await response.json();
document.querySelector('#reply').textContent = data.reply;
Real website में loading, failed request और timeout का message भी दें। Submit button disabled रखने से accidental duplicate clicks घट सकते हैं। Backend को फिर भी duplicate और excessive requests से बचाव करना होगा; frontend check अकेला protection नहीं है।
अब AI provider जोड़ने का हिस्सा
Rule-based reply की जगह server-side adapter जोड़ें, जो चुने गए provider की official API को call करे। Provider endpoint, supported model और response format अलग हो सकते हैं। दूसरे tutorial का model ID blindly copy न करें। Credentials server environment में रहें; frontend को केवल आपका chatbot endpoint मिले।
Adapter में request timeout, response validation और usage controls रखें। Business FAQ context में दें, लेकिन prompt को access control न मानें। Calendar में appointment बनाना हो तो authenticated tool और server-side slot validation चाहिए। Customer data या internal API तक unrestricted access न दें।
Provider quota खत्म हो, rate limit आए या response invalid हो तो user को साफ fallback दिखाएँ। Billing dashboard में monitoring रखें और application side पर request rate तथा message length limit लगाएँ। Public endpoint को केवल CORS policy से सुरक्षित मानना ठीक नहीं; CORS browser behavior नियंत्रित करता है, सभी clients को नहीं।
VPS पर application तैयार करें
Server पर SSH से connect करें और non-root application user बनाएँ। OS updates और supported Node.js runtime install करें। Project files उस user के owned application folder में रखें। Dependencies वाला project हो तो committed lockfile के साथ npm ci चलाएँ। Demo में external packages नहीं हैं, इसलिए उसकी जरूरत नहीं है।
Secret configuration को web-accessible folder से बाहर रखें। Environment file को Git और public uploads में न डालें। Application को loopback address पर रखें; public traffic reverse proxy से आएगा। इस demo का server इसी वजह से 127.0.0.1 पर listen करता है।
Process को SSH session से स्वतंत्र रखें
Terminal में node server.mjs चलाकर connection बंद कर देना reliable deployment नहीं है। systemd जैसे process manager से app start और restart करवाएँ। अपने paths तथा user name से यह example service configure करें:
[Unit]
Description=Website chatbot service
After=network.target

[Service]
User=chatbot
WorkingDirectory=/opt/website-chatbot
EnvironmentFile=/etc/website-chatbot.env
ExecStart=/usr/bin/node /opt/website-chatbot/server.mjs
Restart=on-failure
RestartSec=5
NoNewPrivileges=true

[Install]
WantedBy=multi-user.target
Node binary का actual path command -v node से देखें और service में वही लिखें। User, folder और environment file मौजूद हों। Service enable करने के बाद status तथा logs जाँचें। केवल configuration save होने से app चालू नहीं होता।
DNS, HTTPS और reverse proxy जोड़ें
Subdomain का A record सही VPS IP पर रखें; IPv6 record हो तो उसका route भी सही होना चाहिए। Nginx या server के supported proxy से HTTPS traffic को 127.0.0.1:3000 तक पहुँचाएँ। Valid certificate और automatic renewal configure करें। Existing web server/cPanel है तो conflicting proxy install करने के बजाय उसकी supported configuration इस्तेमाल करें।
Firewall में आवश्यक public web ports और restricted SSH access रखें। Node का port 3000 सीधे public करने की जरूरत नहीं है। Website अलग origin पर है तो backend में केवल intended website origin allow करें। WordPress server-side proxy इस्तेमाल करेंगे तो उसके authentication, rate limits और failure handling भी तय करें।
Go-live का actual proof क्या होगा?
पहले server का health endpoint देखें, फिर public HTTPS domain से request करें। WordPress page से chatbot message भेजें और relevant backend logs मिलाएँ। खाली input, invalid JSON, बहुत लंबा message और unavailable API जैसी conditions जाँचें। हमारे local demo में health, services reply, unknown-question fallback, empty message और invalid JSON की जाँच हुई; ये cloud deployment के proof नहीं हैं।
Server reboot के बाद process वापस आया या नहीं, browser mobile पर chat चल रही है या नहीं और logs में secrets तो नहीं दिख रहे—ये भी देखें। Real leads collect हों तो storage, deletion policy और backups तय करें। Demo की fixed replies को actual AI service की तरह पेश न करें।
जरूरत के अनुसार Bluehost VPS और hosting plans यहाँ देखें। Purchase से पहले runtime support, managed/self-managed scope और renewal cost confirm करें। Working local app, persistent server process और verified public website connection—इन तीन stages को पूरा करके ही deployment को complete मानें।
Official references: Node.js HTTP server basics, Bluehost VPS options और Bluehost DNS management।
Affiliate disclosure: Bluehost link से eligible खरीदारी करने पर WebTakniki को commission मिल सकता है।